なんと!ACF Proさんでグーテンベルクのブロックが作れてしまうんですね!
ACFすごい!えらい!という訳で早速試してみました。
ドキュメントはこちらです。
ドキュメントに沿って、testimonialブロックを作ってみたいと思います。
テーマディレクトリに、/blocks/testimonial ディレクトリを生成して、block.json ファイルを用意します。
STEP 1
block.json ファイルを用意する。
/blocks/testimonial/block.json
{
    "name": "acf/testimonial",
    "title": "Testimonial",
    "description": "A custom testimonial block.",
    "style": [ "file:./testimonial.css" ],
    "category": "formatting",
    "icon": "admin-comments",
    "keywords": ["testimonial", "quote"],
    "acf": {
        "mode": "preview",
        "renderTemplate": "testimonial.php"
    },
    "align": "full"
}
特に説明は必要なくても大丈夫だと思いますが、カテゴリーの種類をいつも忘れてしまうので、書き出しておきます。
text, media, design, widgets, theme, embed(マニュアルより)
サンプルでは、mode が preview になっているのですが、auto の動きの方が私は好きです。
STEP 2
functions.php で上記の json を読み込ませます。
add_action( 'init', 'register_acf_blocks' );
function register_acf_blocks() {
    register_block_type( __DIR__ . '/blocks/testimonial' );
}
ちなみに、json ファイルを利用せずに、register_block_type に直接 json の内容を PHP 配列で渡すこともできます。
STEP 3
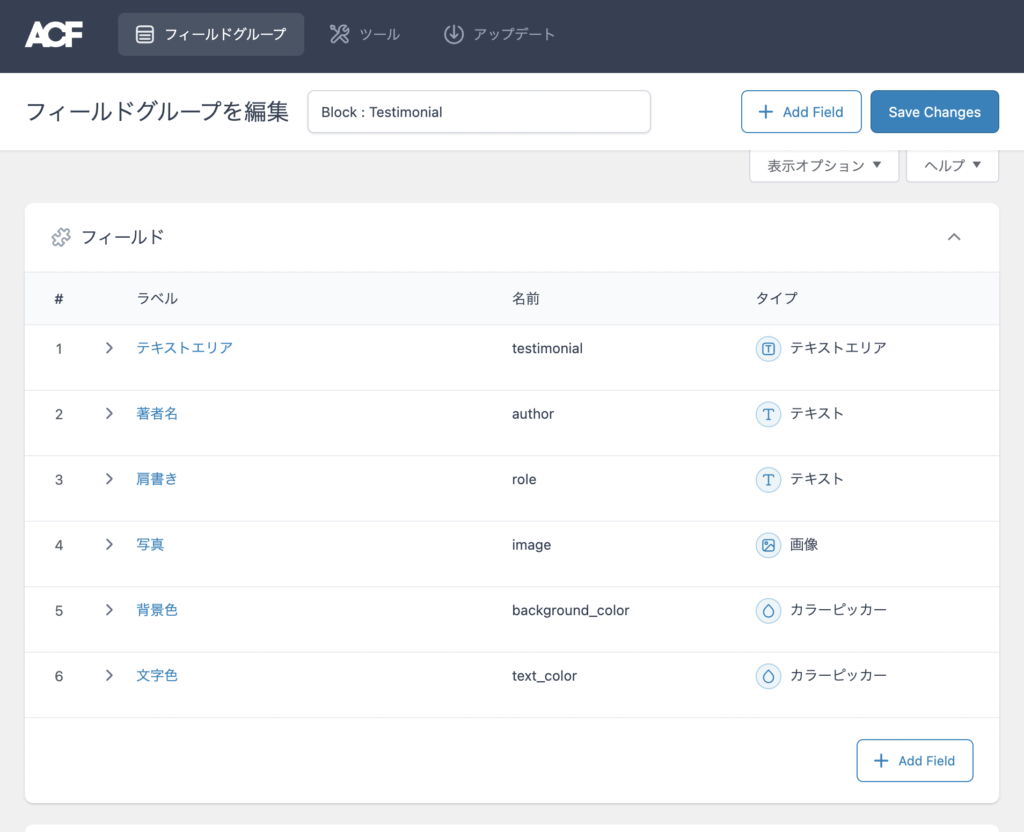
ACF でグーテンベルクで登録するカスタムフィールドを用意します。
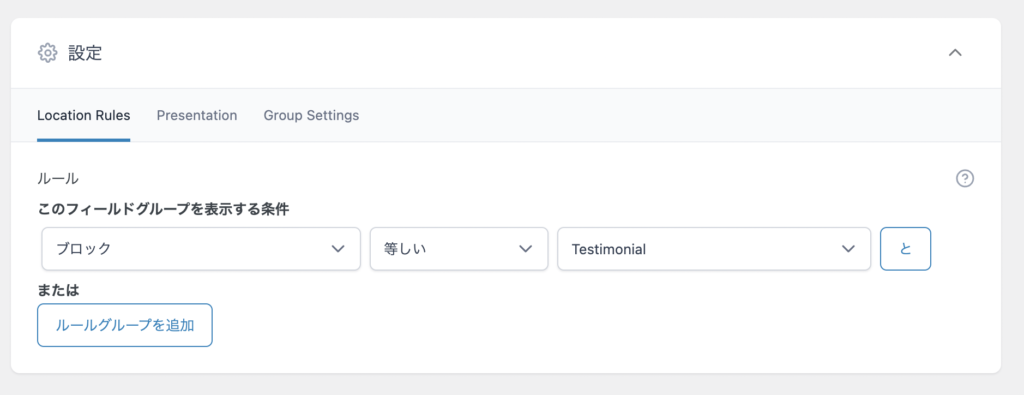
カスタムフィールドの表示場所は、ブロックの Testimonial です。
STEP 4
登録されたブロックを出力する処理を作ります。
/blocks/testimonial/testimonial.php
<?php
/**
* Testimonial Block Template.
*
* @param   array $block The block settings and attributes.
* @param   string $content The block inner HTML (empty).
* @param   bool $is_preview True during backend preview render.
* @param   int $post_id The post ID the block is rendering content against.
*          This is either the post ID currently being displayed inside a query loop,
*          or the post ID of the post hosting this block.
* @param   array $context The context provided to the block by the post or it's parent block.
*/

// Support custom "anchor" values.
$anchor = '';
if ( ! empty( $block['anchor'] ) ) {
$anchor = 'id="' . esc_attr( $block['anchor'] ) . '" ';
}

// Create class attribute allowing for custom "className" and "align" values.
$class_name = 'testimonial-block';
if ( ! empty( $block['className'] ) ) {
$class_name .= ' ' . $block['className'];
}
if ( ! empty( $block['align'] ) ) {
$class_name .= ' align' . $block['align'];
}

// Load values and assign defaults.
$text             = get_field( 'testimonial' ) ?: 'Your testimonial here...';
$author           = get_field( 'author' ) ?: 'Author name';
$author_role      = get_field( 'role' ) ?: 'Author role';
$image            = get_field( 'image' ) ?: 295;
$background_color = get_field( 'background_color' );
$text_color       = get_field( 'text_color' );

// Build a valid style attribute for background and text colors.
$styles = array( 'background-color: ' . $background_color, 'color: ' . $text_color );
$style  = implode( '; ', $styles );

?>
<div <?php echo $anchor; ?>class="<?php echo esc_attr( $class_name ); ?>" style="<?php echo esc_attr( $style ); ?>">
    <blockquote class="testimonial-blockquote">
        <span class="testimonial-text"><?php echo esc_html( $text ); ?></span>
        <span class="testimonial-author"><?php echo esc_html( $author ); ?></span>
        <span class="testimonial-role"><?php echo esc_html( $author_role ); ?></span>
    </blockquote>
    <div class="testimonial-image">
        <?php echo wp_get_attachment_image( $image, 'full' ); ?>
    </div>
</div>
get_post_meta() は使えないので注意です。
STEP 5
実際に動かしてみよう!
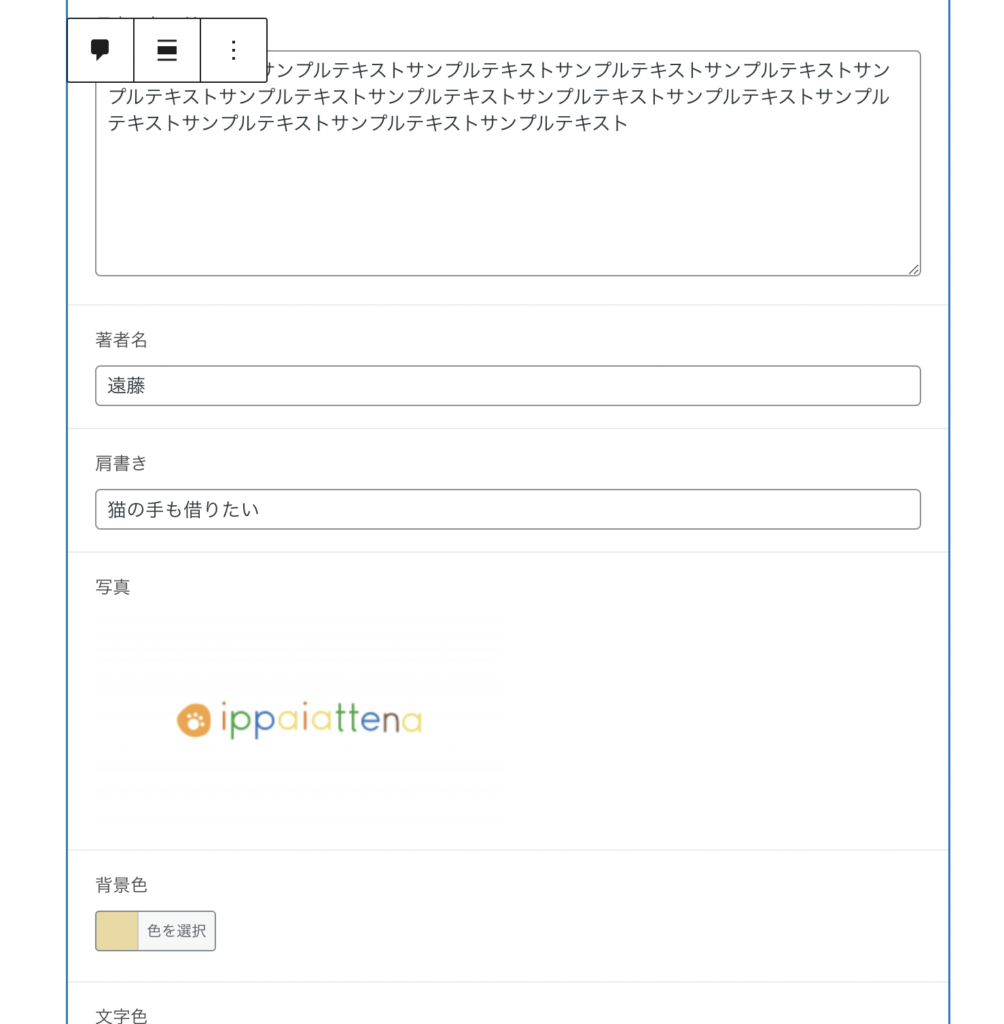
ブロックを選択します。

入力
出力確認
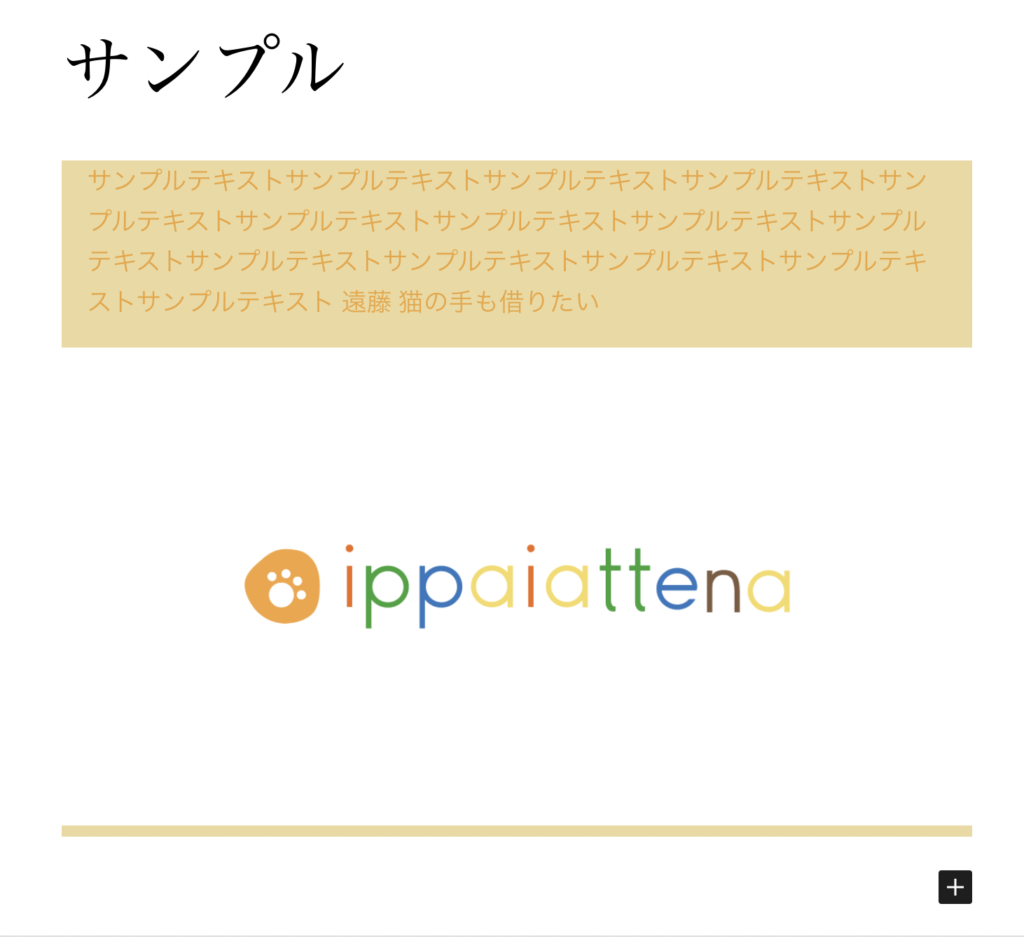
出力されていますね!٩(๑❛ᴗ❛๑)۶
実際に利用する際には、CSSで整えるなどの作業が入ります。
今回も最後までお付き合いいただきありがとうございましたm(_ _)m

